In Cubit Estimating a height of the Verticle wall takeoff can be set before measuring the shape or after the shape has been measured. Below are the 2 way the height of the wall can be set or modified.
When drawing a new shape:
1. Open the Job.
2. Create a new Estimate item and set the Result type as Vertical Area or Vertical Area Less Openings.
3. On the Viewport, open the plan for takeoff.
4. Ensure you have a Polyline selected from the Home ribbon, Shapes to draw a shape.
Note: Make sure the plan is scaled.
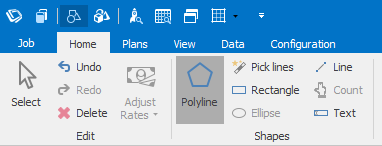
Fig 1. Shapes tool for take off
5. On the New task pane, under the heading New Shape, edit the Description to set a shape name and edit the Height(mm). Under the Next line heading, you can also edit the Start Height(mm) and/or End Height(mm).
Note: Start / End Height calculates the height details for the next line drawn. This doesn’t affect any completed shape.

Fig 2. New task
6. Draw a shape to create a wall of the desired height.
To change wall height for existing shape:
1. Locate the Vertical Area / Vertical Area Less Openings item to be adjusted from the Estimate Sheet and open its Calculation Sheet.
2. On the Calculation Sheet, locate the specific shape to be adjusted.
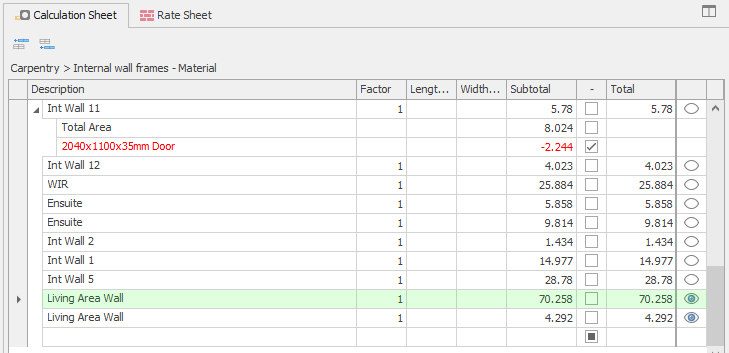
Fig 3. Shape on Calculation Sheet
3. On the Details pane for the shape, you can edit the height for the specific lines or all lines at once.
Note: If you wish to edit the Wall Height for ALL lines for the shape, under the heading General, edit the Wall height(mm).
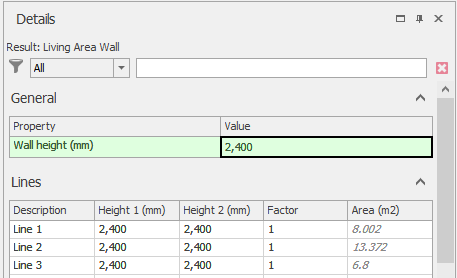
Fig 4. Details Pane General Wall Height
Note: You can edit the Height of specific lines/wall under the Lines heading.
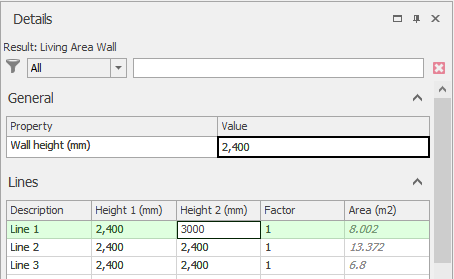
Fig 5. Details pane Line Height
Comments
Please sign in to leave a comment.